Keep the iGaging digital caliper at $37.99 on the bench for everyday sizing. Add a Mitutoyo outside micrometer at $64.79 for the dimensions that actually need a tenth of a thousandth of confidence, like a bearing fit or a thread major diameter.
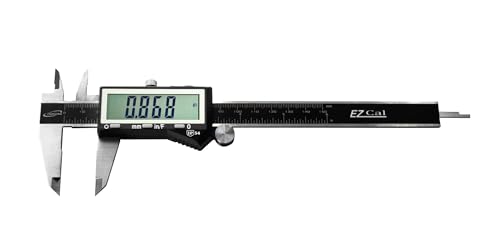
iGaging IP54 Electronic Digital Caliper 0-6" Display...
Check price on AmazonThe two options side by side
iGaging IP54 Electronic Digital Caliper 0-6" Display...
A 0 to 6 inch digital caliper that measures outside, inside, depth and step dimensions with one tool. Fast, versatile, and accurate enough for the overwhelming majority of hobby machining tasks.
Check price on Amazon
Mitutoyo 103-177
A 0 to 1 inch outside micrometer with a ratchet stop and 0.001 inch graduation. Measures one range and one type of dimension per tool, but with tighter, more repeatable precision than a caliper.
Check price on AmazonUse a caliper for the great majority of your measuring: stock sizing, hole spacing, depths, quick checks. Reach for a micrometer only when a dimension actually has a tight tolerance, a press fit, a bearing bore, a thread pitch diameter, since the ratchet stop gives you a consistent, repeatable feel a caliper cannot match.
What is the real accuracy difference between a caliper and a micrometer?
A quality caliper like this one reads to 0.0005 inch, while a quality outside micrometer reads to 0.0001 inch, roughly five times finer. More important than the printed resolution is repeatability: a micrometer's ratchet stop applies the same light, consistent pressure every time, while a caliper's jaw pressure depends entirely on the user's hand feel and can vary reading to reading.
That repeatability is why a micrometer is the tool of record for a true precision fit, even though both tools can technically display a similar number of decimal places.
| Factor | Caliper | Micrometer |
|---|---|---|
| Typical resolution | 0.0005 inch | 0.0001 inch |
| Range per tool | Wide, 0 to 6 inch or more | Narrow, 1 inch per tool |
| Measures inside, outside, depth | Yes, one tool | No, separate micrometer types |
| Reading consistency | Depends on hand pressure | Set by ratchet stop |
Why does a micrometer only cover a 1 inch range?
A micrometer's frame and spindle travel are sized to one specific range, commonly 0 to 1 inch, 1 to 2 inch, and so on, because the fine threaded spindle that gives the tool its precision only has so much travel before accuracy suffers. This is the tradeoff for that precision: a shop measuring parts from a quarter inch up to 4 inches needs a set of micrometers, one per inch of range, rather than a single tool.
A caliper trades that precision for one tool covering the whole range, which is exactly why it stays on the bench for general use while micrometers come out for specific critical dimensions.
When does a caliper measurement actually cause a problem?
Calipers struggle on dimensions with a real tolerance band tighter than a couple thousandths, on shiny or curved surfaces where jaw contact is inconsistent, and on internal measurements where the smaller inside jaws contact a bore less precisely than the outside jaws contact a shaft. A part that needs to press-fit into a bearing, or a thread that needs to check against a pitch diameter spec, is exactly where a caliper reading that looks fine can still be wrong enough to cause a bad fit.
If you are cutting threads and need to verify pitch diameter precisely, pair a micrometer with the three wire thread calculator rather than trusting a caliper reading over the crest of the thread.
How do you actually use a micrometer correctly?
Close the micrometer on the workpiece using only the ratchet stop, never the main thimble, so every measurement uses the same light, repeatable pressure. Check the tool reads zero with the anvils closed before trusting a measurement, and clean both anvil faces before every use since a single chip of swarf between them throws the reading off by exactly its own thickness.
Full technique, including how to check and adjust zero, is covered in how to use a micrometer.
What should a home shop buy first, and what comes next?
Start with a single 0 to 6 inch caliper, since it measures outside, inside, depth and step dimensions with one tool and covers the bulk of hobby sizing needs from the first project onward. Add a 0 to 1 inch outside micrometer once you hit a project with a genuine tight fit, a bearing bore, a pressed bushing, a thread that needs to check clean against a pitch diameter spec, rather than buying a micrometer before you have a job that needs one.
From there, a shop that regularly works larger stock adds micrometers in 1 to 2 inch and 2 to 3 inch ranges as projects demand them, while a shop staying mostly under an inch in diameter may never need more than the first micrometer purchased.
Shop the tools for this
An even spread across the price range, cheapest to premium.


Frequently asked questions
Can a caliper replace a micrometer entirely?
For most hobby work, yes, since the overwhelming majority of hobby dimensions do not need micrometer-level repeatability. A caliper cannot fully replace a micrometer for true precision fits like bearing bores and press fits, where the ratchet stop's consistent pressure and finer resolution genuinely matter to whether the part fits.
Why do micrometers only measure a 1 inch range each?
The spindle thread that gives a micrometer its fine resolution only has so much usable travel before the mechanism loses accuracy, so manufacturers build each frame to cover one inch of range. A shop that regularly measures parts from small to several inches in diameter typically owns a small set of micrometers rather than one tool that spans the whole range.
What is the ratchet stop for on a micrometer?
The ratchet stop is a small knob at the end of the thimble that slips once a set amount of pressure is reached, so every user closes the micrometer with the same light contact force regardless of hand strength. Always close the final turns with the ratchet, not the main thimble, to get a reading that matches what the next person measuring the same part would get.
Is a digital micrometer worth it over a mechanical one?
A digital micrometer adds an instant numeric readout and sometimes a data output port for recording measurements, useful if you are logging dimensions across a batch of parts. A mechanical vernier micrometer costs less and never depends on a battery, and many machinists find reading the vernier scale becomes second nature within a few projects.
How often should I check my caliper and micrometer against each other?
Check them against each other, or against a known gauge block, every few months or any time either tool takes a drop or gets exposed to heavy coolant or grit. A quick check is measuring the same precision ground pin or gauge block with both tools and confirming the readings agree within the tools' rated resolution.
Can I use a micrometer to check a caliper is reading accurately?
Yes, measuring the same feature with both tools and comparing results is a practical way to spot a caliper that has drifted out of calibration, since a well-maintained micrometer is generally the more trustworthy reference of the two. A consistent gap between the two readings across several measurements points to the caliper, not the micrometer, needing attention or replacement.
Keep going
More comparisons
- 7x14 vs 8x16 mini lathe
- Carbide vs HSS lathe tools
- Digital vs dial caliper
- Dial indicator vs dial test indicator
- ER32 vs 5C collets
- Portable bandsaw vs 4x6 horizontal bandsaw
- Spiral point vs hand taps
- Cobalt vs titanium drill bits
Researched from published specifications, standards and verified owner reviews. Not professional advice. How we research.